Projects Links

Click on the "Links"  to go to Project and About Pages Click for Projects Links                                 About the Vess...

Sunday, August 24, 2014

Topside Repair Work

Repairing Damage and Painting Topsides

damage region of pit & gouges in topsides

The topsides had an area of pits and gouges confined to region of about  a 2 foot radius.   The first photo shows this area.   I am not sure of the origin of damage to the topsides or if it was associated with the missing rub rail and missing toe rail as they all were located on the starboard aft end of the boat.

I used a grinder and a 36 grit sand flip disk to gingerly sand this area down.  And even though this area is above the waterline, I decided to use epoxy and an epoxy fairing of 50-50 colloidal silica to 3M glass spheres.
repaired topside region after sanding epoxy fairing

It appeared that the hull was previuosly painted and that it looked like and exact match to Brightsides white.    The area was first painted using a rolling and tipping technique, but due to the shine of the new paint and the sharp edges of rolling and tipping, you could see the shaded patch.   I sanded this down with 320 grit and using a Preval spray gun, painted over the area and blended out the area.
 topsides after touch-up painting with Brightside
using a Preval spray gun
after painting, polishing, and waxing

here is another area requiring wet sanding,  notice the shaded
region near the bow 


removing old name required wet sanding and touching up


Painting the Stern


stern freshly painted
The Johanna Rose was missing the original LF38 swim ladder.  In it place was a plywood board which was used to temporarily mount an outboard engine.  I filled all of the holes with epoxy thickened with colloidal silica and re-drilled the original swim ladder holes.  Since the transom is a confined finite area I decided to sand and paint it all by rolling and tipping with two coats of Interlux Brightsides.


Installing a New Swim Ladder


Installing a New Swim Ladder


The stern topside freshly painted prior to ladder installation.

The Johanna Rose was missing the original LF38 swim ladder.  In it place was a plywood board which was used to temporarily mount an outboard engine.  I filled all of the holes with epoxy thickened with colloidal silica and re-drilled the original swim ladder holes.  Prior to ladder installation, the transom was painted  by rolling and tipping with two coats of Interlux Brightsides.  See post on panting topsides for painting details.


swim ladder installed and looking pretty
I started looking for a swim ladder which would work and look somewhat original.   I was not happy with the one I found online and especially at the prices listed.  I was then able to get measurements of the LF38 swim ladder from other owners.  The plan was to now have one manufactured.   I started obtaining quotes from various places online, and one of the places I looked into to was listed by Stella Blue in a post on "Stanchion and Rail Bases".   The vendor was Tops-in-Quanity which now links to White Water Marine Inc in Port Huron, MI.   I sent them photos of the ladder along with the best measurements that I had.  When I spoke to Mike over the phone at White Water Marine he said  they could build that swim ladder and in fact they still had the specs sheet from when they built the originals!  Wow, I was getting an original remanufactured LF38 swim ladder and all for $330.  Double Wow!


Sunday, August 10, 2014

Bottom Work


The Haul Out


Removing the old ablative bottom paint

This may sound crazy but it worked out very well and made the job much easier.   I starting off making little but steady progress sanding off the old bottom paint with a combination of 40 and 80 grit sandpaper using an orbital Dewalt sander.  This is a messy, toxic, and muscle aching process.

I found that scraping off the old bottom paint went much faster. The paint came off in chips which fell nicely onto a tarp for easy clean up.  The key is using a good scraper.  I used a Bahco scraper with a long lasting sharp carbide blade.  I even purchased a replacement blade but never needed to replace the original blade.   Yes, one blade scraped the whole hull and it was still sharp.   But more important than needing to replace blades is that a good sharp carbide scraper will remove the bottom paint without gouging the underlying surface.  After scraping, a light sanding with 80 grit and it was done.

Below are pictures illustrating the process.


jack stand patch showing old bottom paint

Bahco carbide scraper
jack stand patch during scraping with Bahco scraper,
after scraping and a lite sanding, the area looks like surrounding 

Keel Fairing

Standard for C&C, the Landfall 38 comes from the factory with an external lead keel bolted through a solid fiberglassed keel stub.  Most C&C sailboat exhibit a mostly cosmetic crack along the keel/hull joint.   This is commonly referred to as the C&C smile.  There are many solutions to deal with the C&C smile, typically ranging from yearly caulking and painting to more long term elaborate fiberglass wrapping.   At some point prior, the Johanna Rose had her whole keel fiberglassed over.  Unfortunately, the fairing which was used over the whole keel was a polyester based as it (and only the fairing) was full of blisters.  From my inspection, it appeared that the work was done using epoxy resin and fiberglass, but for easy sanding, polyester fairing was used over the fiberglass.  It may have seemed reasonable at the time, or unwisely justified since a barrier coat was applied over the fairing.

The fairing was removed down to the fiberglass on the keel.  The fiberglass was in great shape with absolutely no blistering issues.  A gallon of East System epoxy with hardener was purchased  along with a gallon of colloidal silica and a gallon of 3M glass spheres from Noah's Marine Supply.   First the exposed fiberglass was wetted with epoxy then faired over that with thickened epoxy using a mixture of 50-50 colloidal silica to the 3M glass spheres.   As most know,  sanding epoxy is a like sanding a rock.   Thickening with 3M glass spheres, makes sanding the fairing much easier, but on vertical surfaces you need to add colloidal silica to the mix otherwise the fairing runs and sags.  Te West System pumps were used to meter the epoxy (5:1) which greatly aided in making many batches.   Once cured, the fairing was sanded with 80 grit using an orbital sander.


Barrier Coat

After performing all hull and keel fiberglass, epoxy fairing, and sanding work, an Interlux Interprotect 2000E barrier coat was applied.   As recommended by the manufacture, 5 coats of Interprotect 2000E was applied in alternating colors of grey and white.    The barrier coats went on without much issue.  For the current temperature, each coat required at least 2 hours of drying time before overcoating with additional barrier coat.   The last barrier coat required special attention and planning as you needed to apply the bottom paint within a time window(there is a finger print test).  In my case, about an hour after applying the last barrier coat,  I was applying the bottom ablative paint.  Since it took about an hour to apply the last barrier coat, I basically went from barrier painting to bottom painting.

hull prior to barrier coating
first application of Interprotect 2000E


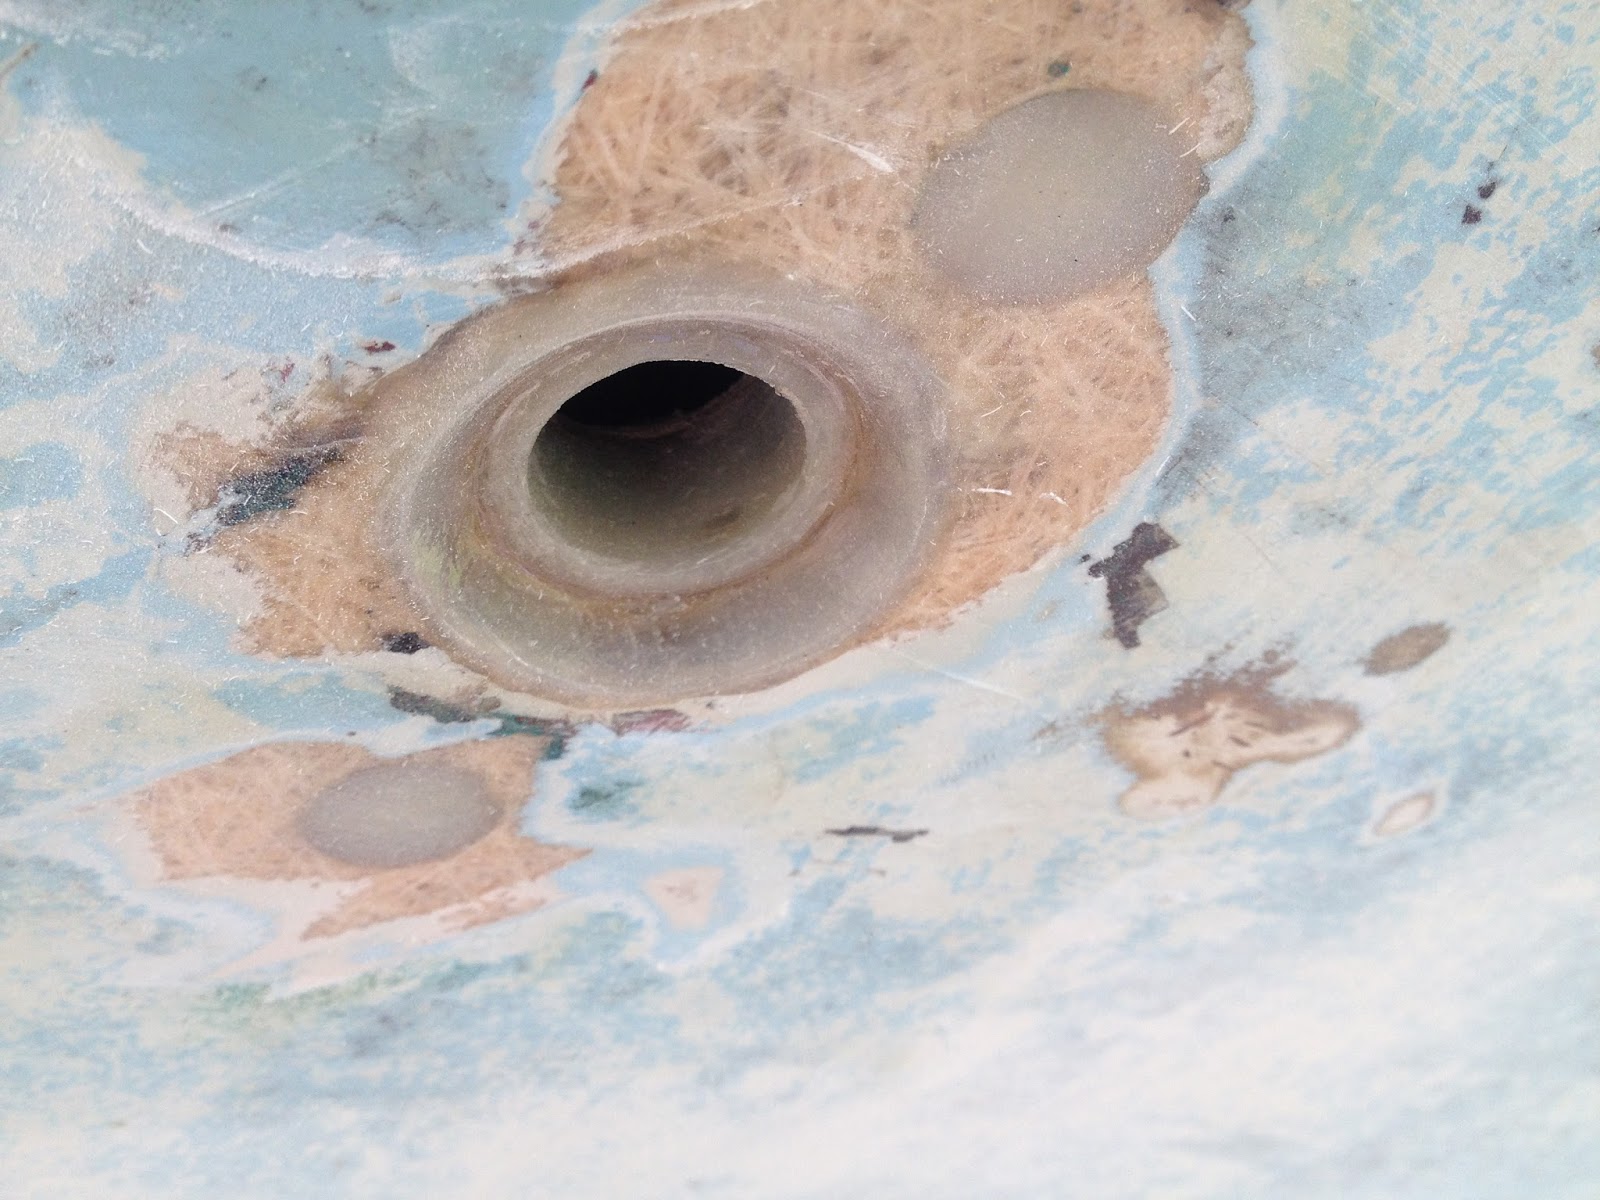
flush mounted thru-hulls

four coats of Interprotect 2000E ready for the fifth coat followed  by bottom paint


strut with cutlass bearing and shaft removed


Ablative Antifouling Bottom

Pettit Ultima SR-60 Antifouling Paint was used on my C&C 29, and after several years in the water, the bottom was still looking great.  The only problem occurred with the bottom 6" of the keel which was due to the keel sitting in soft silt during the winter low tides.  A good stiff brushing did clean this area up and exposed fresh antifouling paint.  The rest of the hull would get a little slimy which would be remove with a dive mask every few months wiping with a microfiber wash glove.    Based on the good previous results,  Pettit Ultima SR-60 was chosen for the antifouling bottom paint.   This stuff is a bit expensive, but too often I see people pay half as much for bottom paint but then need to paint 3 times as often.  


bottom painting
bottom painting 


a look from astern


bottom with rudder installed and painted

 propeller, shaft, and new cutlass bearing


 Bottom Paint Performance

I hauled the vessel out at the end of 2017 so that I could install a new refrigeration system which required replacing the galley sink thru-hull and seacock with integrated thru-hull heat exchanger.

Saturday, June 7, 2014

New Mast Step

Old Mast

The original LF38 mast step.
Here is a photo of the old mast step.  I knew from the get go that I had to unstep the mast and replace the step.  From what I have read this is a common problem with most LF38s.  The failing in C&C construction is that the center of the base was not well supported under the step.  The step rested on marine plywood, and over time wet plywood rotted away allowing the force of mast to push down and break the step.


Designing a New Mast Step

I looked into having a new mast step welded up from Aluminum angle stock like others have done. But I was told that it may be easier to have the mast step milled out of a solid block of Aluminum.  The idea was that while material cost would be higher, CNC milling is virtually labor free whereas welding is much more labor intensive.  Yes, much of the material is cut out, but it gets recycled.

Below is drawing from the 3D model of the mast step used to generate the CNC step file.  The mast step was milled the same day I dropped off the material.


CAD drawing of new mast step.
A solid block of 6061 grade Aluminum
formed the beginnings of the new mast step.


Mast step after CNC machining.
New mast step next to old broken step.


Mast step painted with several coats of epoxy paint.


Repairing the mast step support


1/2" structural fiberglass (FRP) board was used
to replace rotted plywood support.
Additional 1/4" FRP was added to build up
the support base before adding thickened
epoxy and leveling with the mast step.


Mast Step Installation with Coin

When I unstepped the mast I found a coin in the mast step. The coin was a 1976 U.S. Bicentennial dollar coin.  The practice of putting a coin under the mast has its roots in Greek mythology.  The theory goes that coins were placed there to pay the ferryman, Charon his fee for taking the departed across the River Styx to the afterlife should the vessel be lost.  While I'm not superstitious, I do like a good yarn, so I cleaned up the coin, stuck it down with a little sealant to the mast step.  Let's hope it's never needed.
Mast step installed with Bicentennial dollar coin just forward of the feel bolt.


Monday, June 2, 2014

New Thru-hulls and Seacocks


Old Thru-hulls & Seacocks

When I purchased the Johanna Rose, I had to transport this engineless vessel over 130 NM home to my marina.   I did not dare touch any of these seacocks for fear of disaster.  once hauled out of the water, I was glad to first remove the old thru-hulls, decaying seacocks, and cheap hose which were used for under the waterline scupper drains(see photos).

A concern with with any cored hull boat is water intruding into the core and leading ultimately to delamination.   The Johanna Rose exhibited no signs of wet core as she tapped out solid all around, had no signs of blistering (other than over the lead keel, see post on bottom work), and did not weep during the many months on the the hard.  But the first real concern and test was in removing the old thru-hulls.   Old leaky thru-hulls have been know to cause wet core problems.  On the LF38, which is cored with end grained balsa ever where except for regions where thru-hulls are located.   In this area the core is marine grade plywood.   the Johanna Rose has 8 under water thru-hulls: 2 in the galley, 3 in the head, and 3 in the engine well.  I removed all thru-hulls with a tool I borrowed from the marina.   Upon inspection of the inner core, I found no wetness or indications that thru-hulls were leaking.  This was a great news.  


removing old thru-hull


a close up view of the engine water intake seacock
& port scupper seacock

old seacocks in the engine well, notice the quality hose 


NEW Thru-hulls & Seacocks
  • thru-hulls  
    • (2)    3/4”    Groco FTH-750 
    • (1)    3/4”    Groco TH-750 
    • (3)    1-1/2” Groco FTH-1500
    • (2)    3/4"     Groco THXL-750-W  
  • seacocks 
    • (5)     3/4”     Groco FBV-750 
    • (3)     1-1/2”  Groco FBV-1500


Reaming Back the Core and Filling with Thickened Epoxy

The plywood core was reamed back from the thru-hull hole using a Dremel and a sanding drum following the procedure illustrated by Wally Bryant on the Stella Blue site.  The seacock boltholes were over drilled to expose clean fiberglass.  A coat of Johnson Paste Wax was applied to a thru-hull so that a thru-hull inserted into curing epoxy would release easily.  These thru-hulls were inserted with thickened epoxy to fill the inner reamed out area and a proper faired flush mount fit.  The reamed out area and the boltholes were first wetted with epoxy before being generously filled with epoxy thickened with colloidal silica.  


thru-hull in galley near keel stub


The Installation

The seacocks are mounted to backing plates made from a 1/2" sheet of structural fiberglass (FRP).  These FRP mounting plates are first aligned using a tightened thru-hull, marked, and then epoxied to the hull after grinding a clean surface.   The hull and backing plates are first coated with wet epoxy and then coated with epoxy thicken with colloidal silica  and finishing with a fillet of thickened epoxy along the backing plate circumference.  Care was taken so that epoxy would not interfere with the seacocks threads, but just to get certain, a tightened waxed thru-hull remained in place while the epoxy cured.     Prior to final installation, the thru-hulls were removed, soaked in Naphtha to dissolve the wax.   With the seacocks firmly epoxied to the hull, the thru-hulls were installed using plenty of adhesive/sealant.  after which the area is cleaned, sanded, and lightly faired with thickened epoxy.


  Seacocks
engine well seacocks 

new seacocks in the head

new seacocks under the galley sink


Thru-hulls
port scupper thru-hull and engine intake thru-hull 

starboard scupper thru-hull

head thru-hulls


head thru-hulls after first barrier coat