Yanmar 3QM30 diesel engine
performance
33 HP @ 2800RPM
573 lbs dry weight
6 liters/hr @ 2300RPM
6.8 liters/hr @ 2600RPM 30HP
I was told by the previous owner that he had paid a mechanic to remove the engine from the boat and have it rebuilt. The engine was removed, disassembled, and the main crank journals turned down 10 mils. But that's all the work that got done. The previous owner painfully discovered that his mechanic had a drug problem and that his mechanic "blew" his money away. The previous owner had to then get another mechanic to retrieve the engine in parts.
I purchased the boat anyway without seeing the engine, but I was told that it was a complete and rebuildable engine. The year earlier,
I had rebuilt the top end of a Yanmar 2QM15 in my C&C 29, so I figured rebuilding a 3QM30 myself would be achievable too. What I received as an engine was an engine block and a mess of parts in several old decaying cardboard boxes. I was told later by a friend that what I have was not an engine but rather a "basket case". After going through the parts and cross listing them with the Yanmar 3QM30 Service manual and the 3QM30 Part catalog, I was pleasantly surprised to find that there were only a few missing components: an alternator and the pre-combustion chamber components for all three cylinders.
Here are some photos of my basket case after I cleaned and organized the parts a bit:
 |
| crankshaft showing some pitting |
 |
| engine block |
 |
lower end components,
note the 2 main bearing housings above the pistons |
 |
| top view of engine block w/ sleeves |
 |
| misc. covers |
 |
| cylinder head |
 |
| upside down front block view |
 |
| fuel injection pump and lines |
 |
| exhaust manifold system |
 |
| governor arm |
 |
| oil sump |
 |
| starter |
 |
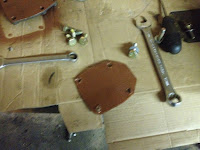
fuel pump mount showing
broken stud |
 |
| Paragon SAOV w/ Walter V-Drive |
 |
| gearcase |
My big fear was that the engine would not be feasible to rebuild due to a problem like a bad cylinder head, block, or other expensive component. Well, I believed this to be true on two separate occasions.
The first time, happened when I was trying to get a price quote for Yanmar parts. I have purchased parts directly from the Yanmar region dealer, Mastry Engine Center, and so I called them directly. When I asked for 0.25mm undersized main bearings, I was told that Yanmar does not make them for the 3QM30. This was followed by a statement that a replacement crankshafts are no longer available. This was a show stopper. I started looking for a replacement engine, but also I did not give up, and thanks to Google I found an Australian website which listed the Yanmar 3QM30 part numbers for the undersized main bearings. I entered these part number into a search and came across Hoye Tractor Parts in Texas where I purchased all of the 3QM30 bearings, seals, and the pre-combustions chambers at a great savings.
The second time I thought the engine was trash, was a bit of my own doing. I removed (cut out with a dremel tool) what I though was a main bearing from the block, but in fact, it was a block crankshaft sleeve. I was really, really lucky to know someone who milled a new steel sleeve, pressed it into the block, and bored the sleeve for a main bearing interference fit(see photos below). I likely would not have had this problem if I had received the engine whole and tore down the engine myself.
Since the engine at that time was not an immediate need, the block and parts sat in my home garage while I slowly clean, stripped, wired-wheeled, and spray painted the engine parts with several coats of Yanmar grey. Care was also taken to clean and ream all of the oil ports throughout the engine block. These ports were in dire need of a good solvent cleaning with long wire brushes.
Photos: removing cylinder liners and repairing the salvage sleeve in the block
 |
| removing cylinder liners |
 |
| cleaning & stripping block for painting |
 |
| main bearing which presses into sleeve |
 |
| repair sleeve from block |
 |
| block showing cut sleeve |
 |
| block without sleeve |
 |
| new sleeve being made |
 |
| pressing in new sleeve |
 |
sleeve after boring for interference fit
for main bearing |
 |
| main bearing installed |
Shop Work [$350]
- cylinder head check & valve job [ Kevin's Machine Shop, Crawfordville, FL]
- rebuilt fuel injector pump & check injectors [ Shiver Diesel Injection, Midway, FL]
Engine Parts
Yanmar Marine parts [$1000]
3) 124750-22090 piston & rings
3) 724770-01900 cylinder liners
1) 721370-92602 gasket set
1) 124790-01870 cover
1) 124772-52120 clutch cover
1) 24423-203508 seal, clutch cover
1) 124450-01250 cylinder nut
1) 124450-01800 oil seal
3) 121250-13521 exhaust manifold gasket
1) 22360-060000 snap pin, governor
2) MEC1101 spray paint, Yanmar grey
Yanmar parts purchased from Hoye Tractor [$500]
3) EV-4600 EXHAUST VALVE
6) VS-4460 VALVE STEM SEAL
1) MB-225A 2ND MAIN BEARING .25 OR .010"
1) MB-325A 3RD MAIN (FLANGED) BEARING .25 OR .010"
1) MB-425A MAIN BEARING .25 OR .010"
1) MB-525A MAIN BEARING .25 OR .010"
3) RB-45A ROD BEARING .25 OR .010"
1) CS-4085 SEAL REAR CRANK
1) CS-1250 SEAL, REAR CRANK
3) IW-3854 INJECTOR INSULATOR
6) GW-4900 CHAMBER GASKET
3) IC-1141 INJECTOR CHAMBER UPPER
3) IC-4450 INJECTOR CHAMBER BOTTOM
Engine Rebuild
The central main bearing on the crankshaft are bolted on the shaft in bearing housings before inserting into the engine block. Once the crankshaft is placed in the block, main bolts hold the main bearing housings to the engine block. The main bearing housing have an extremely tight fit to the engine block. Initially the crankshaft/bearing housings would not fit into the block. It seemed as if it was too big. Rather than risk damaging the bearings, block, or crank by hammering, the engine block was expanded by heating while the crankshaft and bearing housings were shrunk by freezing. Once this was done, the crankshaft went easily into the block.
 |
| inserting new cylinder liners |
 |
| block without crank |
 |
| heating (expanding) the block |
 |
| freezing (shrinking) the crank |
 |
| block with crankshaft installed |
Final Engine Assembly
With the crankshaft installed, the remaining assembly proceeded rather quickly. The nice thing about these old diesels are that they are not complicated. The Yanmar 2QM20/3QM30 Service Manual provide plenty of information, but I also recommend that one also get a hold of the Yanmar 2QM20/3QM30 Parts Catalog. The later shows detailed exploded views of parts for each subsystem. This is not only helpful in identifying the Yanmar part number for ordering parts but it is also quite useful filling in the missing information from the Service Manual. Both the service manual and parts catalog can be found online.
One word of caution, connect the governor arm before closing the sump pan. Inserting the little clip can be tricky. I lost it during the insertion and it shot into the slot by the camshaft and crankshaft. I had to remove a dressed sump gasket to retrieve it. Look closely at the photo below and you can see the little clip right under one of the lobes of the camshaft.
 |
| inserting new pistons |
 |
| camshaft showing lost clip |
 |
| main seal at bell housing |
 |
| cylinder head ready for installation |
 |
| engine with sump pan installed |
 |
| engine sitting on sump pan |
 |
| engine sitting on sump pan (opposite view) |
 |
exhaust manifold end gasket made out
high temperature NAPA gasket material
coated with coppercoat |
 |
| exhaust manifold coppercoated ready for end plate |
 |
| completed engine |

 |
| running the engine for the first time |
Installing the Engine
Getting the engine out to the boat and then into the boat took about 20 minutes with the help of the kind hearted but ever witty Mr. Luke at the Marina. The real difficulty was working the 600 lbs of engine into the engine well and onto the mount struts. I built a ramp using plywood, 2x4's, and 4x4's in such a way so that I could disassemble it with the engine above it in place. This ramp had to extend far into the engine well covering and protecting the propeller shaft and stuffing box. Recall that because of the v-drive transmission setup, the engine basically sits about the propeller shaft. The engine had to move the full length over the stuffing box before aligning on the struts and having adequate clearance. It was a tight fit from below and above. This process took me all afternoon.
 |
| bringing engine out to boat |
 |
| lowering engine through companionway |
 |
note that the engine is sliding over the
propeller shaft |
 |
| coaxing the engine back into place |
 |
a block and tackle helped man handle
the engine into place |
 |
| engine installed & running |
 |
| engine view from cabin |
 |
| engine view from lazarette |
 |
| view of the stuffing box & propeller shaft under the v-drive |


