Projects Links

Click on the "Links"  to go to Project and About Pages Click for Projects Links                                 About the Vess...

Tuesday, March 15, 2016

Installing and Bedding Deck Hardware

Cleat Installation

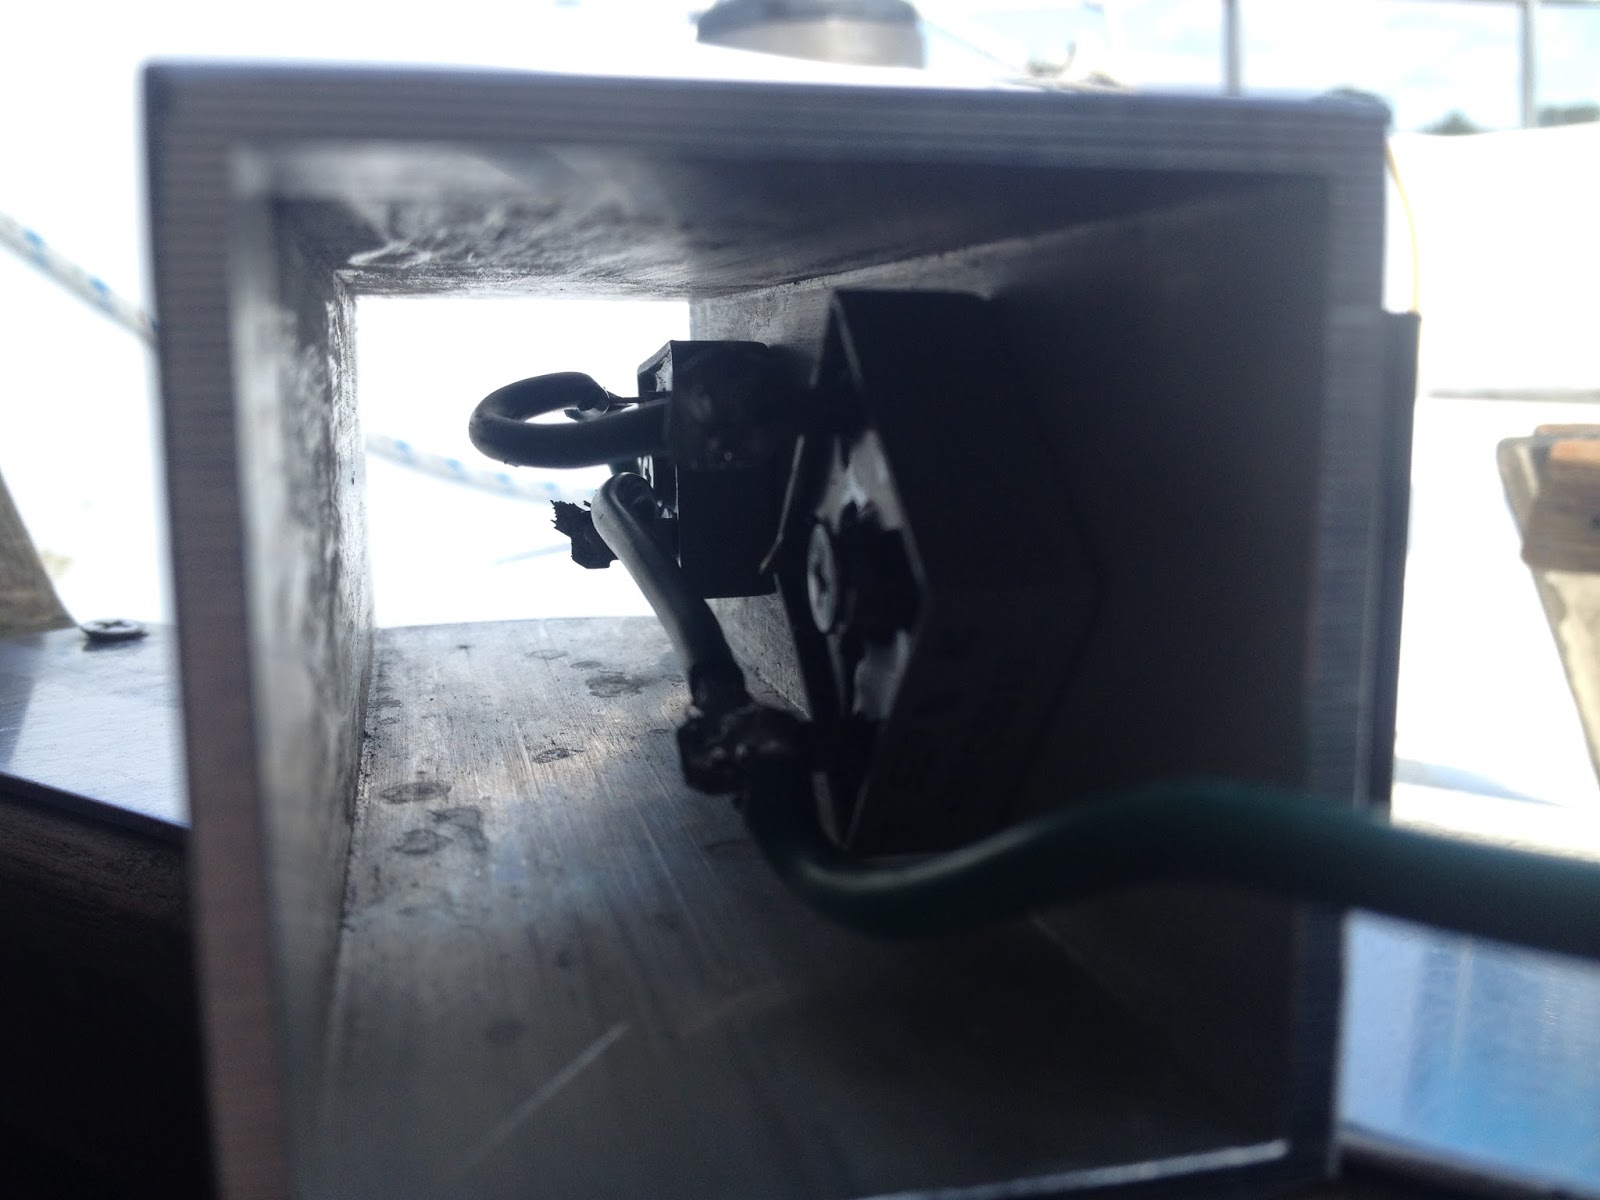
 This deck cleat, mounted by the mast winches, was previously screwed on the cabin top with stainless steel oval head screws.  There are a few places where using screws would be acceptable, but cleats should be through bolted with proper backing plate or wide fender washer backings.  This cleat was removed and the screws hole filled with thickened epoxy prior to the repainting of the deck.  Below is the description of properly reinstalling the cleat with 5/16" stainless steel oval head bolts.


Preparing the bolt holes

 3/4" flat-blade wood bit
After marking the bolt hole center locations, a 3/4" flat-blade wood bit was used to over drill the bolt holes removing the top fiberglassed layer and the deck coring.  Care was taken to drill the hole deep enough to just remove the wood coring but to leave bottom fiberglass layer intact.  

If the deck hardware was already through bolted, but with bolt holes that exposed the core, these holes should have been prior filled with thickened epoxy along with a proper cleaning of the surfaces removing all traces of the old sealant.

If the coring is wet or rotten it should be removed by reaming the material out and letting it dry.  Soaking the wet core with alcohol aids in water removal and drying.  This is because both are highly soluble in one another and with a higher alcohol to water concentration the vaporization temperature of alcohol is much lower, so the alcohol/water mixture evaporates much quicker.


Over drilled holes remove core material exposing clean dry core.

Filling the bolt holes with Epoxy

Over drilled holes wetted with epoxy. 
Before filling the holes with a thickened epoxy mixture, always wet the hole and remaining core surface with un-thickened epoxy.  Start off by mixing a batch of epoxy resin and hardener. Throughly wet all inside surfaces with the epoxy.  Gently heating the surface (not the epoxy) with a heat gun prior to applying the epoxy helps the wet epoxy soak into the core.  With the hole not going completely through the bottom layer(tap the underside if there is penetration), the hole can be completely filled with epoxy then extracted (after 20-30 seconds) with a syringe leaving behind a throughly wetted surface.  Alternatively, throughly wetting with an epoxy/acid brush also works well.  After soaking the surfaces, the brush can be used to wick up excess epoxy.

Over drilled holes filled with thickened epoxy.
Next, thicken the epoxy with colloidal silica to a mayonnaise consistency.  Completely fill the holes with the thickened epoxy.  The advantage to having on oversized hole is that it is easier to fill the hole with thickened epoxy without leaving trapped air bubbles.  Any remaining air bubbles can be removed by mixing the thickened epoxy in the holes with a small wire (like a straightened paper clip).  An alternative is to gentle heat the epoxy mixture.  This will temporarily make the mixture less viscous and allow it to flow nicely filling up the hole.  Don't over heat the epoxy mixture as it can prematurely kick-off the epoxy.

After the epoxy kicks and while it is still green (hard but soft tacky surface ), the top deck surface with thickened epoxy can be easily cleaned up and trimmed flush otherwise a Dremel with a sanding drum does a nice job of trimming the thickened epoxy when fully cured.
 
Bedding the hardware

Deck cleat properly bedded with Bostic 940FS.
With the thickened epoxy cured, mark the centers for new drill holes aligning the new center marks in the center of the previously filled holes.  Drill the proper sized bolt holes through the center marks and chamfer the holes with a countersink bit.   When bedding, the chamfer provides an area for the sealant to form a gasket around the bolt.

Apply sealant to the underside of the hardware and spread evenly then insert the bolts in the hardware and apply a thick ring of sealant on the top of bolt treads and underside of the hardware.  Now insert all hardware bolts in the holes and simultaneously push down the hardware and bolts.   Now from below, fit a backing plate or use fender washers and snug the nuts by turning the nuts only and not the bolts.  Don't over tighten them.  This will allow the sealant to push out and form a gasket.  Over tightening is bad as it will push out too much sealant limiting proper sealing.  After the sealant has partially cured, tighten down the nuts without moving the bolts.  This is much easier using nuts with separate lock washers rather than the nuts with built-in nylon lock inserts (i.e. nylon lock nuts).

Now for a word on sealant.  Butyl tape works well for bedding hardware, and there are many online references attesting to this.  While I have used butyl for some hardware bedding, lately I have come to favor using Bostik Marine 940FS adhesive/sealant for several reasons.  For one, my marina keeps it in stock at a very reasonable price.  But more importantly, it has performed extremely well.  It also skins over and partial cures in about 30 minutes.  This allows me to bed the hardware, complete the tightening of the hardware,  and clean-up with an hour.

Here is a description of 940FS from the Bostik website:


Bostik Marine 940 FS is recommended for use in bonding and sealing applications, particularly where permanent elastic bonding between surfaces is required. It can be used above and below the waterline. Its outstanding adhesion and UV resistance properties target this product for sealing deck hardware, through-hull fittings, rub-rails and portholes applications.


Newly bedded cleat in use.


DYI Galvanic Isolator

Isolation of Galvanic Voltages (A self inflicted problem)

The main purpose of Galvanic Isolator is to provide isolation from galvanic voltages which result from bonding the AC and DC grounds.  The reason for connecting the AC & DC grounds is to provide an Effective Ground-Fault Current Path from the DC ground to the AC ground.

But in principle, the AC to DC ground connection, and thus a Galvanic Isolator, should not be needed since GFCI( also called ELCI or RCD) protection should be used for all vessel AC loads.  This can be accomplished for the whole vessels by installing an ELCI Main Circuit Breaker such as a BlueSeas model 3106100. In fact, the ABYC E-11 now requires all new vessels to have such a device. An  ELCI/GFCI detects ground-faults and disables the circuit.  Disabling a ground-faulted device by eliminating the power source is much safer than just providing a safe effective ground-fault current path.

Many small and older sailboats do not suffer from galvanic corrosion.  The reason is that these vessels often do not have their AC & DC grounds connected.  If a vessel has only a few AC outlets, then the likelihood of an AC to DC ground-fault is rather small.  Typically on these vessels only a battery charger is interfaced to both AC and DC power systems.  But any decent marine battery charger should be built to ABYC / UL 1236 standards which require isolation of AC & DC (i.e., Don't use cheap chargers).   In any case, one GFCI outlet can protect the whole boat from ground faults making the vessel ground fault safe without the necessity of connecting DC and AC grounds.

So why connect the AC and DC grounds if ELCI/GFCI protects the vessel from ground faults?  To be honest, there is no good reason.  Famed boat guru Nigel Calder advocates against connecting AC and DC grounds.  And new standards no longer require AC to DC ground connections when the "whole-craft" is ELCI protected.  See IOS 13297 excerpt below.

A possible reason given is because of the "other guy".  That is, electrical problems which originate external to (i.e. outside) one's vessel.  These are problems due to faulty or incorrectly wired shore power or poor/faulty electrical systems on neighboring vessels.  While GFCIs can protect a vessel from self ground faults, unfortunately a GFCI will not protect against external faults.  No one wants to work on an engine and end up being the conduit to ground for a stray neighboring current.  In this case, an AC to DC ground connection can provide protection (unless one is removing the engine ground in which case an AC to DC ground connection could be harmful).

Given all of this, it does not make much sense to spend a lot of money on a Galvanic Isolator.  But rather, invest in an ELCI Main Circuit Breaker.  These devices cost less than most Galvanic Isolators.  If one does connect the AC & DC grounds then one should make this connector through a basic Galvanic Isolator like a Yandina (or DYI device like the one described below) since this type of connection, opposed to cutting and inserting into the AC "green" ground, does not compromise the vessel AC ground fault safety, that is a fail-safe connection.   A good DYI Galvanic Isolator is easy to make and cost relatively very little (~$10).   The DYI Galvanic Isolator shown below was made with free scrap material costing only $5.60 for the rectifiers.


Components
Bridge Rectifier
  • (2) Bridge Rectifiers 
    • 50A 1000V Metal Case Bridge Rectifier with Heatsink  
    • KBPC5010
    • Amazon: $2.80 each w/ free shipping
  • length of green wire & solder
  • (2) crimp-on ring connectors
  • (2) 1/4-20 SS bolts for wire terminal ends


Component & Circuit Description

First grab the rectifier and identify the "+" terminal.  This terminal is marked with a "+" and is oriented at right angles to the other three.  Diagonally across from the "+" terminal  is the "-" terminal.  The other two terminals are the AC terminals sometimes marked with a "~".  The "~" terminals are not used and are often best cut off to make it easier for making wire connections and eliminate installation mix ups or later shorting out.  

Below is the circuit diagram.  Shown are the two rectifiers connect by wires.  The arrows show the direction of current flow. Each rectifier connection only lets current to flow in one direction.  The two opposite rectifiers allow current flow in alternating direction (i.e. AC).   But current can only flow when the voltage exceeds ~1.2 Volts (twice the forward bias voltage of single  diode). Since galvanic voltages are well below 1 Volt, galvanic DC currents are blocked whereas AC currents are not.


Circuit Assembly

The diagram shows the input and output green wire connected in the middle of a wire connection of the (+) & (-) of each rectifier.  In fact, it is easy to use one long wire (~ 1ft) on each connection.   A stripped wire end can be tightly wrapped through and around the (-) terminal while the (+) terminal connection can be made by stripping out an inch of insulation from the wire just a little way from the (-) end (without cutting the wire) and wrap this bare wire tightly around the (+) terminal leading remaining wire out.   To further secure the mechanical connection, the wire can be soldered at the terminals.   Alternatively, crimped spade connector connections should also work fine for making wire connections.


Circuit diagram: The arrows show the direction of current flow. Each rectifier connection only lets current to flow in one direction.  The two opposite rectifiers allow current flow in alternating direction (i.e. AC).   But current can only flow when the voltage exceeds ~1.2 Volts (twice the forward bias voltage of diode). Since galvanic voltages are well below 1 Volt, galvanic DC currents are blocked whereas AC c currents are not.


Making a simple housing  container 


With the galvanic isolator circuit complete, a simple housing box can be fabricated using a scrap piece of square aluminum tube.  Each rectifier can be bolted to the inside and to the heat sink on the outside.  The green wires can be led out the ends and through a simple end caps made of HDPE.  A bolt can be added top each end cap to form connection terminals, and a crimped on ring connection can be added to the trimmed green wire ends and connected the end bolt terminal.  Alternatively, one could use a prefab housing box or even a simple piece of round tube or right angle extruded aluminum. 

Aluminum allows for efficient heat transfer.  But normal operation does not generate heat.  Heat  is only generated if there is an actual ground fault.  In principle, the circuit can operate at currents higher than a 30AMP shore power supply.   But one should also be using GFCI circuit protection which would cut the power if a ground fault exists.   


DYI Galvanic Isolator prior to installation.


A Fail Safe Galvanic Isolator Installation

First off, it is important to use a decent marine battery charger and not a cheap $10ish charger.   All AC loads on a vessel should be GFCI protected, and even better use in addition, an ELCI Main Circuit Breaker in the main AC panel.   Then install a Galvanic Isolator  between the DC ground and the AC ground and not by cutting/installing in the AC green ground line.   This arrangement provides redundant protection mainly via the total GFCI protection and additional safe guards of galvanic isolated AC/DC ground fault path while not breaking the wire or adding components in series to the AC ground fault line.


Extract from ISO13297

4.2 The protective conductor (AC Earth) shall be connected to the craft's d.c. negative ground (earth) as close as practicable to the battery (d.c.) negative terminal.
NOTE If an RCD (whole-craft residual current device) or an isolation transformer is installed in the main supply circuit of the a.c. system (see 8.2), the negative ground terminal of the d.c. system need not be connected to the a.c. shore ground
(protective conductor).


Monday, March 7, 2016

Paragon SAO V Transmission Adjustments

A few months after getting Johanna Rose back into the water, I started to notice a problem with the transmission slipping and thought that I needed to have the transmission rebuilt.  I called Transmission Marine, Inc in Fort Lauderdale and spoke with one of the Paragon experts about a rebuild.  While I received the info on a complete rebuild, I was encouraged to adjust the clutch plates myself first. I received quick instructions over the phone, and later found a nice description online.  Much of the Paragon transmission adjustments described below were provided by Ralph Mudge on the CnC mailing list on Apr 18, 2009.   It turns out that my forward transmission slippage was partly due to a miss-adjustment of the transmission cable causing the transmission to not fully engage (or click) in forward.   My problem was corrected by properly adjusting the transmission cable and by tightening the forward clutch adjustment in the transmission.  At the same time, I adjusted the reversing band. After a year and half and about 50 hrs of engine use later, all still seems fine with the transmission. 

Adjustment of the forward clutches 
Remove the 4 bolts that hold the top cover down and take off the cover. 
(Try to save the gasket, but new ones are cheap)  As you look down into 
the guts, there is a fore and aft shaft that goes through the clutch pack 
that has a castle nut on the end( about 1-1 1/2 ").  With the transmission 
in neutral, turn that shaft with a screwdriver until you find a locking bolt.  
Back off the bolt until you can turn the castle nut.  Careful, a small adjustment 
goes a real long way and there is no frame of reference as to how far 
you have turned it.  In your case, I would try turning it only 2 
notches.  In other words, from the locking bolt turn the nut 
clockwise(facing aft) 2 indentations in the nut (for the locking bolt), 
and lock it down again.  Try it out.  If you have gone too far, the prop 
shaft will slowly turn over in neutral,  meaning that the clutches are 
not fully released. Back up one notch on the nut a try again.  (Though 
neutral is kind of a moving target on this transmission)  If you still 
have slippage, you have not gone far enough, try turning the nut one 
more notch.

Adjustment of the reversing clutch or band
With the top cover off, as you face aft, on the back left side of the 
gearbox, there is a largish nut with a spring clip around it.
Turning that nut clockwise will tighten the band.  Again, small 
adjustments!  One or two flats on the nut make a significant change. 
This will move the reversing movement closer to the neutral spot on the 
shifter, in other words you will not have to push so far down on the 
shifter to fully engage reverse


Top view of Paragon transmission
with top cover removed.


Top cover for Paragon SAO V Transmission


The reserving band adjuster is the horizontal part at the top of the photo
which has holes in the broad bolt-head and goes through the spring. The locking
bolt for the forward clutch adjustment is shown in the center of the photo.   


Transmission Oils
The folks at Transmission Marine, Inc in Fort Lauderdale, recommended the use of ATF or 30W in the paragon and 30W non-detergent oil in the Walter V-drive.  The advantage of ATF is that the fluid provides less drag for the clutch plates in neutral whereas with 30W in the Paragon, the drag can lead to minor turning of the prop shaft while in neutral.  Unfortunately, there are many types of ATF, and some types may actually lead to premature clutch plate slippage.  Because of concerns with transmission slippage, 30W non-detergent is used in both the Paragon transmission and the Walter V-drive.  An added plus is that one only needs to keep one type of transmission oil on hand.