Projects Links

Click on the "Links"  to go to Project and About Pages Click for Projects Links                                 About the Vess...

Thursday, October 29, 2015

Sunday, October 25, 2015

Post Cyclone Sailing

The Sailing that Blew My Scoop Off

I went sailing on Sunday October 25, and I did not realize it at the time, but the building winds were the remnants of Cyclone Patricia (which at one point was a Cat 5 Hurricane on the Pacific coast of Mexico).  The weather buoy data for Apalachicola Bay reported winds average of 16 KTS with gusts of 24 KTS.  In a matter of hours, I sailed over 35 NM, on a beam reach out from Carrabelle to the St George Island Bridge and a beat back to Carrabelle.  It was a nice breeze and I had a lot of fun.


The video above shows a short clip on one of the beats.  With a reefed main sail and slightly furled head sail,  she was making 7 - 7.2 KTS closed hauled.


Dorado box with missing top and scoop. 
At some point on the way back I noticed that one of the stainless steel air scoops was missing.  I guessed that a sheet must have caught on the scoop and ripped the scoop and wooden top of the Dorade box clean off and into the bay.   The photo to the left shows remaining Dorade box.


Session Learned

I have been sailing with the forward scoops facing forward and the aft set of scoops facing back.  This was to promote airflow in with one of the out flows being the starboard aft scoop in the head.  In hindsight, it would have been wise to have the forward scoops facing back.  Also, in preparations for tropical-like storm, it would be wise to remove these scoops and insert screw-in plates or plugs.   The plugs/screw-in plates don't exist, so I guess it is wise to start thinking about them now rather than at the last minute when needed.  For now, I will sail with scoops reversed from what they have oriented.


Dorade Box Repair

Lost Scoop and Boxtop


Dorado box with missing top and scoop. 
The photo to the left shows remains of  Dorade box missing a the scoop and wooden top.  Other photos show measurements from a remaining air scoop needed to find a replacement.


Stainless steel 8" round scoop with 12" height

Stainless steel scoop threads into mounting ring
Scoop base plate with 4" ID.


Dorade Repair


The photos below show the repair of the Dorade box.  A piece of African Mahogany from an old demolished Chris Cris Mahogany Cruiser was used to replace this missing Dorade top.   The piece to cut to have a step fit, glued with white Gorilla glue, and seamed with wood putty.  After a light sanding, the putty was stained to match the surrounding wood, and then the Dorade box was sealed with 3 coats of Cetol Natural Teak.  A used stainless steel cowl vent and base ring was obtain via Ebay for $90 and installed after cutting a circular hole for the vent with a saber saw.

New top board in place and glued with
white Gorilla glue.

Cutting the new top board to fit.


Seams were filled with wood putty.

Dorade box sealed with 3 coats of Cetol Natural Teak.


Repaired Dorade box installed back on the S/V Johanna Rose.
A circular vent access hole will be cut out in the top once a
matching stainless steel replacement scoop is acquired.


Used Nicro Marine stainless
steel cowl vent and base was
purchased on eBay for $90.


Dorade box with replacement cowl vent.


Tuesday, October 20, 2015

Alternative Battery Switch System

Better than just a 1/BOTH/2/OFF Switch 

The information below come from the Forum - Musings With Maine Sail (LINK) .  My version of the set up is slight modification to that originally suggested in Maine Sail posting. It is a battery switch set up which includes a dedicated ON/OFF switch for a starting battery but also retains a flexibility of a 1/BOTH/2/OFF switch to use the house bank for start redundancy.

With this simple but very redundant system you retain all the isolation & redundancy of the 1/BOTH/2/OFF switch yet add a dedicated direct wired starting battery.  Simply keep the 1/BOTH/2/OFF to #2 and control the house power with a DC main breaker at the panel.  When you are ready to start the engine simply turn the ON/OFF to ON and your to start the engine. When you're done with the engine flip the switch to OFF and you no longer have an energized line to the starter.

If the start battery were to fail, flip the ON/OFF to OFF and the 1/BOTH/2/OFF to 1 and now the house bank is starting and providing house loads. Conversely you can still use the start bank to power house loads in an emergency with the 1/BOTH/2/OFF in position BOTH and the start switch to ON.  This latter configuration also allows for starting via both battery banks if needed.
Modified set up as used on Johanna Rose. The 1/BOTH/2 switch located
 in the engine compartment and is left in the switched #2 position always
for normal operation. The On/Off switch is located with easy access by
the companionway and is only switched on for engine operation.  In an
emergency, the 1/BOTH/2 switch can be moved to #1 allowing for the
house bank only to start the engine with the On/Off set to Off or with
the On/Off set to On for both bank starting. 


The photos below show the set up on the Johanna Rose.  The 1/BOTH/2/OFF switch is located in a safe out of the way location in the engine compartment.  This switch is left switched to #2 for normal starting operations. The 1/BOTH/2/OFF switch was intentional placed out of the way to avoid helpful hands from inadvertently making changes.   The ON/OFF switch is easily assessable from an arm reach in the cockpit or inside the cabin.  A Blue Sea 8084 AC/DC Main Panel is powered directly from the house bank.  Also shown, is a Blue Sea ACR-si which is a high current automatic relay that senses the presence of a charging voltage and combines the battery banks for charging.  If the charging voltage drops then the banks are disconnected.  In addition, the batteries are each protected with a 300A MRBF terminal fuses.  [Thanks goes out to Maine Sail for the forum discussions]


The 1/BOTH/2/OFF switch located out of
 the way in the engine compartment.
A dedicated and easily assessable ON/OFF
 switch is used to energize the cable to the starter.


A Blue Sea 8084 AC/DC Main Panel.

Friday, October 16, 2015

Long Range Marine WiFi

Getting the most from WiFi
Marine WiFi system on the S/V Johanna Rose.  An 8dBi gain antenna
& Ubiquiti BULLET-M2-HP are mounted on the masthead.  Outdoor rated
Cat5 e cable is run through the mast to the navstation.  A PoE injector
provides 12V power to the WiFi radio whereas the terminating end of the
Cat 5e  cable is connected to the WAN port of the Linksys router.

At my marina,  internet access is available but the WiFi signal barely makes beyond the marina office.  WiFi systems for boats have become very affordable to build, simple to install and set up, and have a proven track record of performance and reliability. These new systems greatly boost the signal making connections easier allowing for remote/long distance WiFi connections which normally are considered unrealistic.

I originally planned on purchasing a WiFi system from IslandTimePC.com but for some reason they decided to no longer use the Ubiquiti BULLET as the main WiFi radio. So instead of purchasing a complete vendor package, I decided to piece together a system myself based on the Ubiquiti BULLET-M2-HP WiFi radio. While you don't get any hand-holding in setting up and configuring the WiFi radio, you can save over half the cost and have a working system for a little over $100.

This system not only provides dockside access to the local marina WiFi network, it has also successfully connected to a remote WiFi network while anchored 3.5 miles away from the WiFi network(on the hook in an island cove, yea!).


Component List

  • Ubiquiti BULLET-M2-HP Outdoor 802.11 B/G/N M2HP 
    • The Bullet is the transmit/receive radio portion of this setup and comes with its own setup and configuration software built into the unit (AirOS). The Bullet attaches directly to an antenna and receives its power over ethernet (PoE) through the Cat 5e cable and POE injector. 

  • Engenius Outdoor High Gain 8dBi Omni Antenna (EAG-2408)
    • A 2.4GHz Omni-Directional Outdoor Antenna designed to provide increased coverage for existing 802.11b or 802.11g networks.
  • Huacam HCP05 Passive PoE Injector/Splitter DC Connector
    • simple & affordable PoE injector connector
  • Linksys WRT54GL Wireless Broadband Router
    • This is a typical home WiFi router which can be powered by 12V.  It is rated to run from 5V to 40V, so it should run fine with 12V deep cycle marine batteries even with voltage fluctuations.   It consumes about 0.5 A. 
  • Cat 5e Outdoor UTP Solid PE Cable
    • 75' of outdoor cable was purchased from ShowMeCables.com( $0.21/ft)
  • RJ45 Cat 5e Connectors

Masthead showing WiFi radio & antenna.  Also
 seen is the Metz Manta 6 VHF antenna
 and Davis windex.
Hardware Installation


The hardware installation was simple. Prior to restepping the mast, an old TV antenna was removed from the masthead, and the antenna wire was used a messenger for running the Cat 5e cable through the mast. The WiFi antenna screws directly onto the Ubiquiti BULLET forming a single unit. Holes were drilled and tapped for mounting the antenna bracket which support the WiFi radio/antenna unit as a whole. The Cat 5e cable plugs directly into the base of the Ubiquiti BULLET. The base has a screw on weather proof cap with a rubber cable seal. To provide additional weather protection, the RJ45 connector was coated with silicon grease prior to connection and DOW 795 was used to provide additional cable sealing at the cable/base cap.

The Cat 5e cable runs directly from the top of the masthead through the mast to the mast step and then over to the Navstation. At the Navstation, a PoE injector connector connects the Cat 5e cable to the Linksys router and provided 12V PoE to power the WiFi radio. The Linksys WRT54GL router comes with an external power supply on its AC power cord. The AC/DC transformer (aka, the brick part) was cut off of the power cord with remaining part of the power cord connected to a 12V supply at the breaker panel along with the power cord for the PoE connector. Currently the label on the breaker panel for the WiFi has the name "COMPUTER" but Blue Sea makes custom labels for their panels. I may order a "WiFi" label or something a little more descriptive.
Blue Sea custom label


Bullet M2 Setup & Configuration

The Bullet is WiFi bridge/router.  Unfortunately the default configuration is as a bridge which is not what one wants.  So in order to get the system working properly, the Bullet needs to be reconfigured as a router.  This configuration change is rather simple, and there are several online instructions including a few so-so how-to videos online.


The important point to realize is that the system, as a whole, will have two routers each severing IP addresses via DHCP.  The Linksys WiFi router will provide the local boat wireless network which all of your devices will utilize.  Like most WiFi routers, the Linksys uses the private IP network  192.168.1.x.  The default DHCP server on this router will assign devices IP address from 192.168.1.2 through 192.168.1.254.


The second router, the Bullet router, will serve a DHCP IP address for the Linksys unit (i.e. much like what you cable modem provides).  The problem is that the Bullet uses the same default private IP network address space of 192.168.1.x.  So to avoid any IP assignment clashes, the DHCP server on the Bullet router should be reconfigured with a different private IP address (in this case: 192.168.100.20 ) and reconfigured to assign a different set of IP address: 192.168.100.100 -192.168.100.200.  Note that this is not a unique choice, one could have simply used 192.168.2.x.


There are several ways to reconfigure the Bullet as a router.  Most online methods instruct one to use an ethernet cable and directly connect a laptop to the Bullet.  The instructions below are a simple method which uses the local WiFi network.

  1. Set up the local WiFi router
    • This is the Linksys WiFi router.  Set up private WiFI SSID name, security( like WPA2-PSK [AES]), and network password.
  2. Connect the Bullet to network and reconfigure as a router
    • Connect Bullet to PoE injector connector using an ethernet Cat 5e cable(make sure you use a cable so that you get the powered side of the PoE to the Bullet), and power the Bullet with 12V. Once you see that the Bullet led lights indicate that the Bullet is operating, connect the other end of the PoE connector directly to one of the LAN ports on the Linksys router (not the single WAN port). You should be able to connect the PoE connector directly, without a Cat 5e cable.  You should now have the Bullet and local router connected via the ethernet cable/PoE connector. 
    • Using a computer/laptop connected to your local WiFi open a browser and go to: http://192.168.1.20
      • This is the default IP address for the Bullet.  You should see main AirOS page for the Bullet login configuration.
    • Login in and change default password 
      • login (ubnt)/ passwd (uint)
      • Once logged into the main AirOS page
        • change the Bullet's AirOS password (and don't forget what the new password is!) 
    • Reconfigure as a router and change the DHCP IP address space
      • Go to the "NETWORK" tab:
        • Under the Network Role
          •  change Network Mode to: "Router"
        • Under the WAN Network Settings 
          • set WAN IP Address to: "DHCP"
          • change DHCP Fallback to: "192.168.10.1"
          • set NAT to: "enable"
        • Under the LAN Network Settings 
          • change IP address to: "192.168.100.20"
          • set Netmask to: "255.255.255.0"
          • set DHCP Server to: "enable"
          • set Range Start to: "192.168.100.100"
          • set Range End to: "192.168.100.200"
          • set Netmask to: "255.255.255.0"
    • Now click the change button on the bottom of the page and then click on the apply button at the top of the page.  
    • Now move the ethernet cable from the local router LAN port to the single WAN port.
      •  It is important to note that when changing any configuration on the Bullet, BOTH the "change" and "apply" buttons must be selected in order.  This is because the "change" operation saves the settings to the Bullet configuration file but it does not take effect until it is applied.  The "apply" operation reloads the Bullet's configurations and restarts the device.  Once "apply" is selected it may take several seconds or so before the Bullet is responding again.
    • See screen shot image of Bullet M2 Network settings.
  3. Use the Bullet to connect to remote WiFi networks
    • After the Bullet reconfiguration and after replugging the ethernet cable to the WAN port, change the browser address to go to: http://192.168.100.20
      • When the AirOS Setup screen appears click on the Wireless button and then on the ESSID Select button.
        • The Site Survey screen will appear. You will normally select the Access Point with the strongest Signal level (smallest –dBm = strongest signal) and then click Select. In a low WiFi Signal density area a signal strength of -90dBm or more will normally work. However, if there are lots of signals in the area then a stronger signal will be needed in order to provide a decent connection.
        • If you are Marina based or connecting to a pay for use Access Point, you would select the associated ESSID and then enter a password as required. A new screen will popup and at the bottom click Change. then Apply.


Bullet M2 router configurations with new private DHCP IP network settings

Bullet M2 remote WiFi connection of 3.5 miles

Login in screen for the remote WiFi.  The Bullet works great,
in this case it is password protected.

Monday, October 12, 2015

Adding Active Ventilation to the Holding Tank

Eliminate Foul Odors from the Holding Tank

 The principle behind a nice smelling holding tank is quite simple: Noxious odors in a holding tank are caused by anaerobic bacterial decomposition of the sewage in the absence of oxygen.  The bacteria give off smelly gasses such as hydrogen sulfide and methane which smell much like rotten eggs.  By simply adding oxygen through aeration, the balance shifts to aerobic bacterial  decomposition, which does not produce noxious gasses at all.  In a typical sewage treatment plant, oxygen is added to improve the functioning of aerobic bacteria and to assist them in maintaining superiority over the anaerobes(the smelly guys).


When the head becomes too noticeable in a bad way, the main culprit is typically poor holding tank ventilation.  Simply increasing tank ventilation can have a major aromatic improvement.  Passive approaches such as increasing ventilation size or adding multiple vents have long been the go-to solution.  But active approaches, such as pumping air into the holding tank, have shown to be a viable solutions too. 

As I write this, the Johanna Rose has an oder-free holding tank.  The benefits of a new and never been used system.   Ah, but soon it will be christened, and I expect also in regular use.  With all likelihood, the new holding tank system will operate nicely with passive ventilation, but why not give it a little extra help.   Inspired by the success of the virtually no-cost active ventilations systems described by cruisers online, such as the one at http://www.passagemaker.com/articles/technical/systems/foul-odors-run-deep, I am adding an active ventilation system to the holding tank of Johanna Rose all for under $25.  Let's call it the biology experiment.   The cost is cheap, about as much as a few beers out, and I literally get to write about shit.


Active ventilation components
 It turns out that Groco has come out with a similar system called “Sweet Tank,” which uses a small air pump and diffuser to add oxygen thus promoting aerobic bacterial decomposition over the smelly anaerobic bacterial decomposition.


A Simple Active Ventilation System

The following items will comprise the new active ventilation system.  The airline tubing will enter the holding tank through a sealed tee junction in the present 3/4" ventilation line. The tubing will extend to the inside bottom of the tank where it will be connected to an air curtain.  An air check-valve will be used on the air tubing near the air pump tubing connection.  The air pump will run off of the same AC circuit as the battery charger, so while docked at the marina, the holding tank will benefit from the added airflow coming from the active ventilation system.  If needed, future options may go with a DC or solar powered air pump.


Active Ventilation Components


Bug nest which came out of blocked vent hose.
Immediate Success

The active ventilation system had an immediate impact on the holding tank ventilation system during the installation process.  In trying to feed the airline tubing through the 3/4" holding tank air vent hose, a blockage was discovered.  The ventilation hose was originally new, free of any blockage, and just installed on the holding tank a little over a year ago. But all that time, the boat was hauled out and on jack stand storage.  While the new holding tank remained unused and empty, apparently bugs found there way into making a nest in the middle of the ventilation hose.  The photo to the right shows what came out of the blocked vent line.  If it was not for the attempt to insert the airline tubing, this blockage would have gone unnoticed.  


Installation
Topside view of holding tank showing air
 line tubing fed through the holding tank vent hose.

The installation this system in a new (unused) holding tank was simple.  The airline tubing was inserted down through the air vent hose into the holding tank.  
Next, the air curtain was connected to the tubing and then mounted to the inside of the holding tank.  The muscle of the active ventilation system is the air diffuser/air curtain component.  3M VHB tape was used to mount the air curtain feet to the tank.  The tank surface was cleaned with alcohol prior to mounting with the 3M tape. 


The airline tubing connected to the air
 curtain prior to the  mounting of  the
 air curtain to the inside of the tank with 3M VHB tape.

The air curtain mounted inside of the holding tank.


A 3-way tee providing access for the airline tubing to the holding
 tank ventilation hose.


The upstream end of the airline tubing exited the holding tank ventilation hose via a 3-way tee and led to the air pump located in the upper head locker. 

A short section of hose was later added (not shown) along with a plastic insert and sealant to provide an airtight cap of the airline tubing to the holding tank ventilation system.


The air pump is installed in a small locker
 in the head next to an AC outlet.  
The heart of the active ventilation system is the air pump.  The air pump is installed in a small upper locker in the head next to an AC outlet.  The pump runs continuously when on shore power.


See addition post regarding head stink due to sea water inlet: Getting fresh water into head

Sunday, October 11, 2015

Repairing a Leaky Water Tank

Fresh Water Tanks

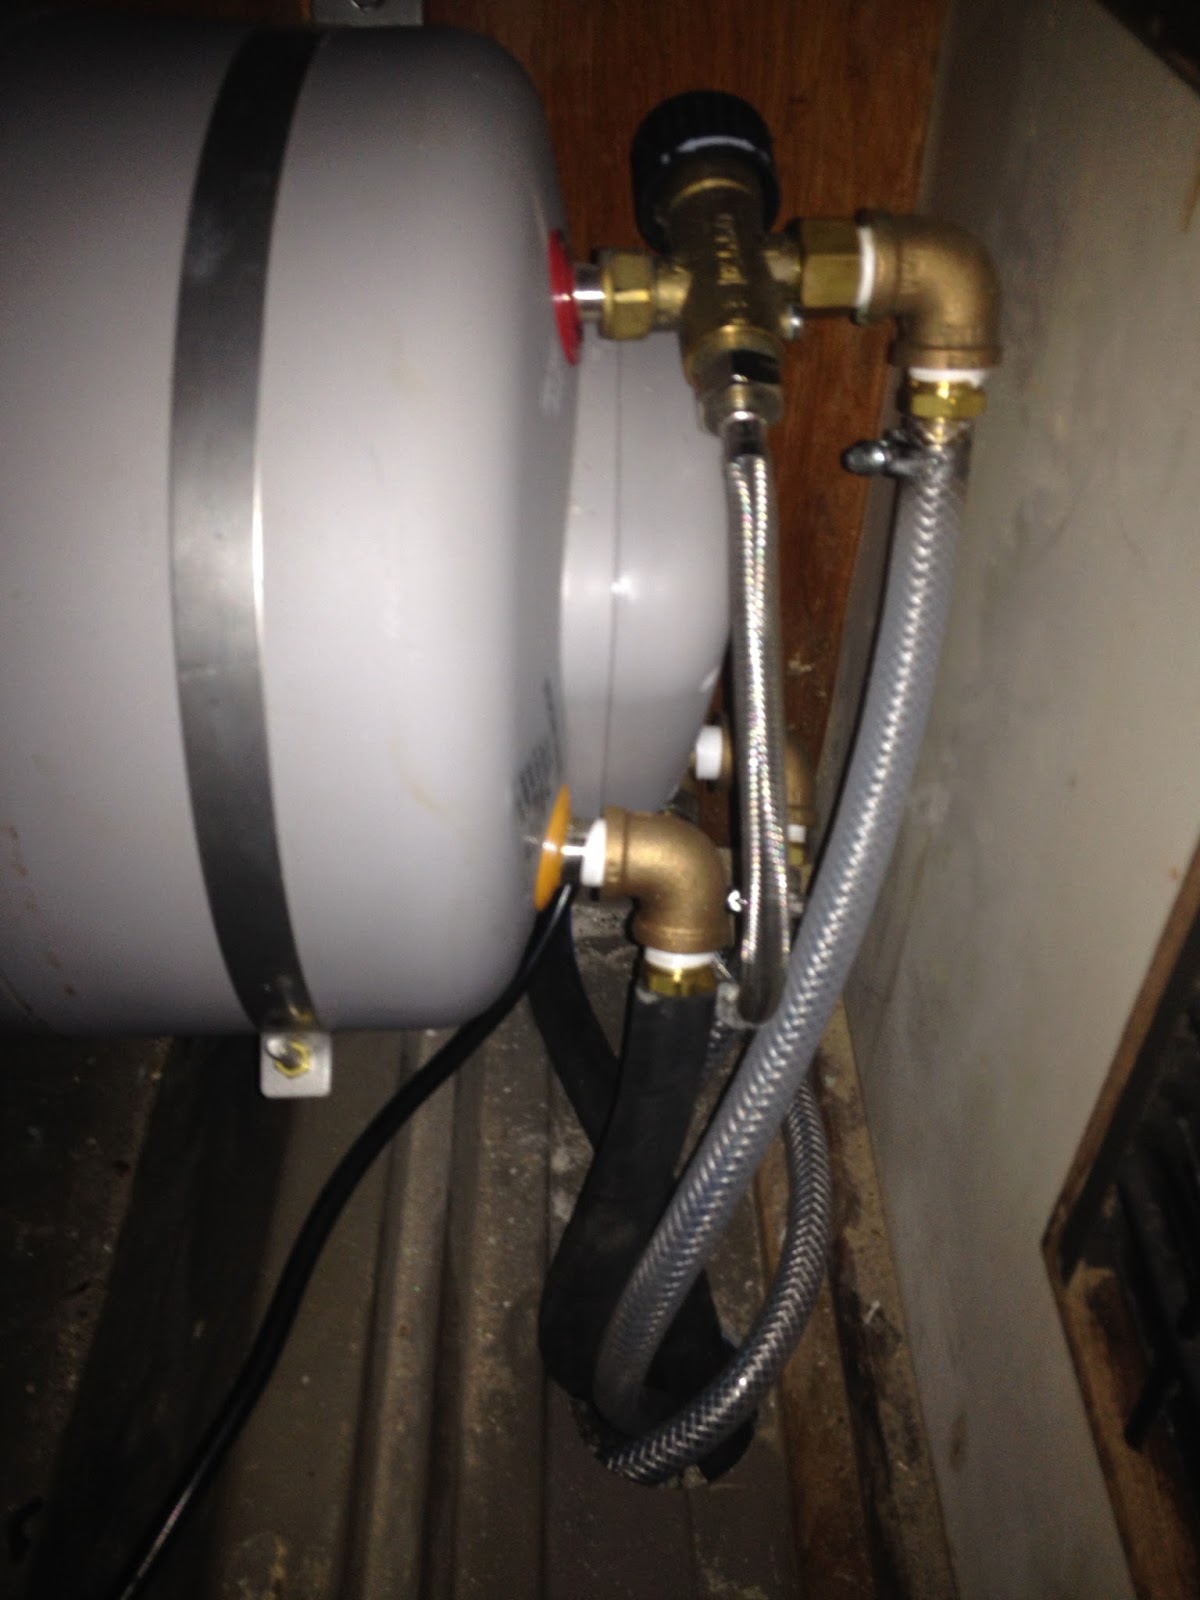
 The original design the C&C Landfall 38 came with a total fresh water tank capacity of 104 gallons. The total capacity was comprised of 3 tanks. There are two 32 gallon tanks, one each under the port and starboard settees, and a 40 gallon tank under the v-berth.  At present, S/V Johanna Rose has only two water tanks limiting the water capacity to 64 gallon.  The v-berth tank was removed to provide additional storage space.


Checking Water Tanks  for Leaks
Port settee water tank.

As part of the fresh water system restoration, the two settee water tanks were tested for leaks.  It turned out the tank on the port side suffered from a large leak due to a long crack along the narrow side along the hull.  The photo below shows water flowing out past a bulkhead due to the tank failure.   The test of the starboard settee water tank revealed  that the starboard  tank has no leaks at present.

Port settee water tank leakage
 during water leak test.


Starboard settee water tank during
water leak test.


Water Tank Repair  #1 (UPDATE: failed attempt)
[ Using G/flex epoxy and 5200 may work for minor leaks is stress free places ]
[ For a more robust repair see section on welding below]

The water tanks are made from polyethylene.  Historically, it is said that nothing sticks to polyethylene.  A somewhat new epoxy from West System,  G/flex 655 epoxy, claims to be able to adhere to polyethylene.  West Systems folks have a great online video of a kayak they cut in half and epoxied back to together.  If you have not seen it, it is a must see.

The following is the procedure used to repair the water tank with G/flex.  It is based on useful information found on the West System website.   I finished the job by covering the G/flex repair with a thick layer of 3M 5200.  I had about 3/4 of an old tube of 5200 stored for some time in a freezer, and while the 5200 is most likely not needed, the 5200 will provide some extra stiffening and a bit of insulation from thermal stresses.
  1. First, holes were drilled at the ends of the cracks to stop the crack from getting any larger.
  2. The area above and below the crack was cleaned by sanding with 80 grit sand paper.
  3. A Bahco tungsten carbide scraper was used to bevel a vee and open up the crack to increase the bonding surface area and to reduces concentration of stress on the joint.
  4. Using 80 grit paper, sand and round the crack opening and crack underside so that the crack has rounded edges.
  5. Clean area with alcohol wipes.
  6. Flame treat a plastic surface.
    • Hold a propane torch so the flame just touches the surface and move it across the surface at a rate of 12 or 16 inches per second. Keep the torch moving and overlap the previous pass slightly. When done correctly, the surface will not discolor or burn in any obvious way. This technique oxidizes the surface and improves adhesion. For best adhesion, bond to the surface within 30 minutes of treatment. 
  7. Mix G/flex epoxy and apply to crack throughly over filling the bevel area.
  8. Let epoxy set.
  9. Clean and wash with alcohol.
  10. Apply a thick layer of 3M 5200 and smooth out slightly wetted with alcohol.
  11. Let cure, flush clean interior volume, and leak test.
  12. Reinstall tank and reconnect water lines

Underside of port water tank.


Port settee with water tank removed.


The tank crack in the port water tank.

Drill hole to arrest crack.
Crack grooved, sanded, torched, and cleaned with alcohol.


Preparing the crack for epoxy.

Preparing G/flex epoxy.
Applying G/flex epoxy to repair port water tank.


Port water tank repaired with G/flex epoxy.

The completed repair
 The job was finished by covering the
G/flex repair with a thick layer
of 3M 5200. 


UPDATE!!!
Repair #1 quickly failed.   I did some more research and found the the best solution was get a hot air plastic welder and weld repair the tank.


Water Tank Repair Using a Plastic Welder [Recommended Repair]
[UPDATE: As of Oct 2016, the repair tanks are still leak free.  This included a 580 NM trip most of which was offshore with much of that beating into wind and waves]

This is the fix that has lasted.  The tank was repaired using a plastic welder.  The welder has a nozzle with an electric heating element that is connected to an air supply.  In this case, the air supply was provided by the output of a small vacuum pump.  The air must be constantly flowing otherwise the heating element will burn out.  I was able to borrow this hot air welder, but the unit is not much different that the hot air plastic welder sold at Harbor Freight Tools (See their 1300 Watt Plastic Welding Kit with Air Motor and Temperature Adjustment).  Since the water tank is made from LDPE, LDPE welding rod 1/8" thick were purchased for the task (Grainger Supply #4VDA6).   To provide added strength to the welded repair, reinforcing stainless steel mesh was added and welded onto the tank surface.  The wire mesh was purchased at Grainger (#3AMD7).

All I can say is that practice welding on scape material first, and before long anyone can be an expert.


Section of plastic weld completely filling the
crack in the tank.  On top of the weld, reinforcing
stainless steel mesh was added and welded onto the
tank surface.  
Plastic welder:  The device is a electric heating tip with hot air
blowing through.  The propane torch is also useful for filling a
bulk void with welding rods, but otherwise it was not used.
The photo also show the package of 1/8" LDPE welding rods
purchased from Grainger Supply (#4VDA6).  


Close up view of repaired tank with reinforcing
stainless steel mesh.


Repaired water tank ready for installation.